Sunday, October 14, 2012

Grand Opening...Coming Soon...

 
Hello! 

Yep, you read that right...

We are opening up a BRAND NEW and IMPROVED CAFE
...and we can't wait to have all of you come visit! 


We've got our GRAND OPENING coming SOON!!!

*A huge shout out to the talented Jana at Little Web Writing Hood!
Definitely worth a visit for stylish custom graphic design needs.
(blog packages, etsy shops, facebook headers, etc.)


Follow IC on Facebook to get all of our updates!

So this week we're sharing our Contributors' favorite posts from the past, while we get things all finished up at the New Inspiration Cafe. 

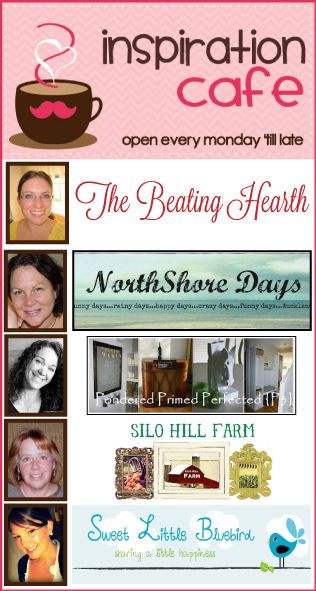
Finally, here's a peak at some of our personal favorites.  Just click each photo to be taken to the actual post.  Enjoy browsing...hey, feel free to spend some time checking out each of our Contributors and see what else we've been up to!

     Image Map


Don't forget to leave a comment saying you stopped by.
We're gearing up for Inspiration Cafe to be a much more open and interactive place, and we want to get to know each and every one of you. 
Have a wonderful week!  ;) 


Thanks for the visit and please, come back again!
The Ladies at Inspiration Cafe 

Friday, October 12, 2012

World Egg Day Today!!

That's right folks, you read it right here.  Today, October 12th is World Egg Day.  So, do what you gotta do...and make something with eggs today!  I am going to show you two recipes in this post because...I've got two egg recipes to talk about.  And this is the day to do it.

egg ham breakfast sandwich

First off: Gourmet Egg and Ham Breakfast Sandwiches.  Now, listen, this ain't no ordinary, run of the mill mcsandwich.  No sir.  This is upping the sandwich style big time!

Can I just say that The Mister has made it known that he married me mainly because I make these for him upon occasion.  C'est la vie.  It is what it is after all.  So ladies, if you are looking to get yourself a man...put these under advisement.


Ingredients:
English Muffins...buy some nice quality English Muffins.
Ham...buy some nice quality ham from the deli...the good stuff.  Not too sweet.  Just a nice, salty ham.  1 lb.
Eggs...as many as you think your family will eat.
American Cheese Slices...My husband and girls favorite kind of cheese
Kraft Sandwich Spread...what is this stuff?  I don't know, but for whatever reason, they are a must on this breakfast sandwiches.

What you do...

First, turn your oven to 200 F.

Now, take a neat pile of ham...as much as you want on each sandwich and place in a lightly greased pan over medium-high heat.  Cook until they get a little caramelized on each side.  Once done, place on an oven-safe plate and pop in the oven until ready.  This way your ham stays warm while everything else cooks!

Tear your English Muffins in half.  Hopefully you got the nice ones that come apart easily and not the nasty ones that you have to end up getting the serrated knife to do the job.  Place in toaster oven and toast until nice and golden.

Scramble your eggs to your liking.  Now, you could also fry the eggs...but my family likes their eggs scrambled, so that's how I do it.

Okay, now work fast!!!  Take the English muffins out of the toaster and spread with Sandwich spread.  Put a slice of American Cheese.  Next top with some of that grilled ham.  Next top with some of your eggs.  Top with other slice of English muffin.  Devour.


You will never look at a breakfast sandwich the same way again.  Quality ingredients make all the difference.  I'm telling you...a proposal will come your way. 

Next recipe...

How to boil and egg...properly.

Hey, yeah, this needs a recipe.  Because, I have seen some nasty boiled eggs in my time...all grayish green....shudder.   So, here it is...


Place your eggs in a pot.  Cover them completely with cold water.  Bring to a boil.  Once they have boiled, remove from heat, put lid on and let sit for 15 minutes.  Once 15 minutes have passed.  Rinse in cold water.

Voila!  Boiled eggs.  Now...if you want to make something fancy out of the perfectly cooked boiled eggs...prepare yourself.  You need some...


And some green olives with pimentos in.    And some paprika.

Take a heaping spoonful of the sandwich spread.  Some salt and pepper and combine with the removed yolks.  Whip until smooth.  Spoon into your empty egg halves.

Sprinkle with paprika.  Add a halved olive in the center and what do you have...


Spooky eye-ball deviled eggs.  Perfect for your Halloween...uhhhh...luncheon with the ladies.

Okay, I guess that was technically 3 recipes.

Enjoy World Egg Day.  I know I'm gonna!

Shared here:
Iron Chef mom

Heather

Thursday, October 11, 2012

The final stretch!!!

Back when I decided I was going to make My Youngest a quilt for her 4th birthday...I figured I would have it done in a week or two, easy.  Fast forward 3 months and I am still not done with it.  I thought I'd have it completely quilted during the Olympics due to all the TV I was watching... But, that didn't happen either.  All I wanted was for it to be done by the time it got cold...

Attention...it is now the middle of October and the quilt is still not done!!  Due to an unseasonably warm summer and early fall...it still isn't cold...but the cold is coming...like...tomorrow. 

p.s.  I'm close.  I am really close.  With the quilting finally complete...and dang did it take longer than I anticipated...here's where we're at as of now...


Chop of the excess fabric.  Cross fingers the quilt is even because as of now...even if it's not, it's how it's gonna be.


Cut an extraordinary amount of 2.5" stripes for the binding.  Sew them together....miscalculate exactly how many inches are needed...


Proceed with the wrestling match known as...sewing on the binding.  Use this tutorial...it's a 3 stepper.  Step 1  Step 2  Step 3


Have just enough binding to make it barely around the quilt.  Let's just say skin of our teeth, here.  It would have been extremely frustrating for me to have to cut another round of binding for a couple of inches.  Very happy it just squeaked by.


We're at the end...hand-sewing the binding onto the back of the quilt.  There is a method (and I've used it before) of machine sewing on the front and back of the binding.  Problem with it I've found is it leaves a visible line of stitching.  So, if you don't mind this visible line of stitching, that's okay.  Me...not a fan.  So I hand stitch around the entire perimeter.


See, you just inch along, folding the binding over and using an invisible applique stitch to hold it in place...3 more sides to go.  I love when a project is completed!  Stay tuned!

Thanks for reading


Heather

Tuesday, October 9, 2012

It's about dang time


...for my ironing board cover to rest in peace. 

But...it's like I always say, when I want to make something, I want to make it NOW!  So, problem with wanting to make an ironing board cover is...casing and rope...I can make a casing, I think...but I didn't have the rope needed and on top of that, the idea of threading a rope through an extremely large casing is enough to make my teeth hurt.  Zero.  Fun.  Sir.

Luckily, I found this tutorial on how to make an ironing board cover using the previous ironing board covers casing and rope.  YAY!

Now, I am not as precise as the lovely Lisa Lam, and I will never pretend to be, but I was lucky to benefit from her excellent tutorial and now have an ironing board cover to be proud of.


My previous cover had a nice insulating pad attached...and I wanted it. So I carefully cut it away from the outside. I only nicked the front once...badly. It almost ruined the whole project. Be careful when chopping.


Do not look too closely at the extremely well-used...almost burnt clear through, nastiness of my previous cover.  It was time to be retired, clearly.


Trace...very carefully around the original cover.  Very carefully, got that?  Now, I normally would be very distressed and think possibly my awesome...Sharpie..yes, Sharpie...marks would show, but I figured I had a pretty good chance that they would all be tucked safely away on the bottom.  Carry on.


Cut.


Now you need to cut out the casing.  Measure 1 inch in from the casing onto the original cover.  Cut.  Preferably better than how I cut.  But, it turned out okay.  My seam allowance though was terribly uneven.  Make yours neat, please.


If you notice above, I had pinned the casing front sides together onto my new cover.  But it falls short.  You need to gather up the excess as best you can.  Try and pin evenly.  It doesn't look pretty, but luckily you're not even gonna see it.  It's tucked underneath.

Sew all around...but don't sew your rope....that'll mess up your tightening ability later on when it's complete.  I sewed this using a 1/2" seam allowance.  Also, sew with the casing side up.  It'll help with the easing of the larger size of the bottom piece.


Toss on some extra padding because you have worn your original padding completely away.


Throw on the new ironing board cover.  Swoon because it is so much more lovely than before...ever before...I mean, even when it was brand new.  It might have something to do with the completely gorgeous Heather Bailey fabric I got on sale.  Thanks Hawthorne Threads. 

Wanna see how the bottom turned out...


Totally good.


Now, iron with pleasure.

Thanks for reading!


Heather

Friday, October 5, 2012

Not-so-Spooky disembodied Hands...Homemade Halloween for Everyone

Are Halloween decorations like children where you can't have a favorite?  Because...this is the 3rd part of my series on simple and cheap decorations...and it may be my favorite...


Again, this uses pretty basic tools...Food Handlers gloves, cute candy, festive ribbons and tape.


Here's what you do.  Get a food-handlers glove.  This may be the only thing that you will have a hard time finding.  And do not make the same mistake I did where I bought latex gloves the first time around....at Costco...in the jumbo mega tub.  No good.  They must be food handlers gloves.  They are clear, for one.  Also they aren't going to stretch all over the place.  Did I mention that I bought a ginormous box of Costco latex gloves the first year I tried this...anyone need some latex gloves?  Anyone?

Now, take festive candies and fill up the gloves.  Make sure to get the fingers good and full. 


Don't go all the way to the top with the candy because you need to tie a knot to prevent spillage.  This is a bit of a trick because I want mine to be quite full...and so I twist the empty portion good and tight and from there I tie my knot.

Take your ribbon, tie a double knot below the knot in the gloves.

Tape to the top of your door.

The End

Thanks for reading!

Other Homemade Halloween for everyone posts:
Spidery Floral Arrangement
Halloween Candy jars

Other fun Halloween Posts:
Ghastly Pillow Covers
Easy to Make House Haunts
Ghastly Wall Hanging

Some tasty treats for Halloween Supper:
Easy Chili and Cheddar Jalapeno Bisciuts
White chocolate Cranberry Bliss Bars...just like Starbuck's


Heather

Thursday, October 4, 2012

Halloween Candy Jars...Homemade Halloween for Everyone

Hi everyone.  Today is the 2nd part of our Homemade Halloween for Everyone series.

My idea behind this series is to give people options on how to make fun yet nicely inexpensive decor.  You do not need to buy Halloween decorations in my estimation. I am all about throwing something together.  It gives you such a sense of pride!


Today we are going to discuss Halloween Candy Jars!!  So simple.  You need Candy.  Probably Halloween style.  Can I just put a disclaimer here...I think candy corns are from the devil.  I think they are about the nastiest creation ever invented.  Even though the very thought of their cloying flavor makes me want to gag...right then...I think they're cute.


Put candy in a mason jar.  I have chosen quart size, the better to display the goodies.  Like the eyeballs?


Tie a bow around the top of the jar....again, choose something suitably Halloweenish.  Black with white polka dots....totally Halloweenish.

The End.

So, just remember, it doesn't take a lot of money to make something that will really dazzle your family and friends.


Here is how I display yesterdays and todays Homemade Halloween decorations.  I have placed them along my hutch and I think they really hit the spot for cute spook!

Thanks for reading!

Homemade Halloween for Everyone posts:
Spidery Floral Arrangement
Not-So-Spooky Disembodied Hands

Shared here:
CSI Project

Heather

Wednesday, October 3, 2012

Spooky Vases...Homemade Halloween for Everyone!

I am going to have a series this week on making your own Halloween decorations that are cute and inexpensive and look pretty darn good (if I do say so myself).

First off.  SPOOKY FLORAL DISPLAY!!


Whoooaa!  I know, right.  a spooky floral display.  What's next spooky bunny rabbits?  For me, it's not just about being outright scary, it's also about a fun ambiance.  I think these little flower pots are so sweetly spooky.


How do you make 'em, you ask.  Get some little Halloween buckets...or you could use vases or anything that will contain some flowers.  I chose white roses because I felt the spiders would really stand out.  Have your sister give you some little plastic spiders...or you could buy some I suppose.  


Cut flowers to fit.  Maybe put some foliage in.  Place spiders willy nilly on flowers.

The End.

As far as easy goes...this is at the tops.  I would like to say that all the posts in this Halloween series are easy.  So stay tuned for more!!

Thanks for reading!

Homemade Halloween for Everyone Posts:
Halloween Candy Jars
Not-So-Spooky Disembodied Hands


Heather

Monday, October 1, 2012

It's gonna be a Ghastly Halloween

Alexander Henry Ghastlies Pillow

Because of this...my favorite Halloween fabric, ever.  And my favorite go-to project when I want to make something quick, spur of the moment and experimental....pillows.


I figured my Ghastly Wallhanging needed some companion pillows.  Of course my camera was d-e-d dead when I was putting them together, so...there's basically no construction shots.  Except of the back.  It's all good.  I pretty much did a Log Cabin around the square with the complementary fabrics.  I think it's cute.  I will admit to having a slight bit of trouble trying to figure out what colors go with Old Lady Mauve and Grandpa Gray....and find it slightly odd that I am decorating an entire month out of the year with these colors...but hey, when it's love, it's love.

I have chronicled pillow making many times...here, here, and also here...sorta.  So here's a quick update.  Ghastly style. 


Cut lace to fit.  But only buy enough to do the horizontal and not vertical sides of the pillow.  Hey, it is what it is.  If I don't have enough of something, but want to sew now, then I just make do.


Remember, for a pocket pillow case, you want to cut the back pieces so they overlap enough that when you shove a pillow in, it doesn't have an unsightly gap.  My front panel is 22 x 22 inches, so I cut my back pieces 22 x 14 inches.  Also remember to put front sides together.  This is my favorite thing to forget.  Luckily I remembered this time before I actually started sewing...this time.  Sew.


Make sure to hem the edges that will be visible.  Normally I would say get out the hem measurer thingy...but this time...I eyeballed it.  Approximately 1/4".  This turned out just fine.


Here's a very important trick...one that I also forget almost every time I make a pocket pillow.  You want the top flap to be on top of the overlap. So, this means you have to place the top flap down first front sides together.  How many times will I say that...probably a lot.

Now sew along both sides.

Flip it right-side out.  Poke out the corners and put a pillow in.  Enjoy.

Thanks for reading!


Heather
Related Posts Plugin for WordPress, Blogger...